|
To watch the youtube video where I speak about this topic and demonstrate the project, click here.
What Is GitLab?
GitLab is a repository for versioning and storing code, just like Github. GitLab has some interesting features, namely continuous integration, which is what we're going to take a look at.
Why Use Continuous Integration and Continuous Deployment?
For most major code projects, there are a few things that need to be done.
1. Code must be written. 2. The code must be compiled or built into an application. 3. The code/application has to be tested. (There may be multiple phases of testing). 4. The code (if it's acceptable) must be deployed somewhere. (Either staging or production, or both.) That may seem like an easy list, but there are a few issues: 1. Multiple people work on the same project, so one person's code may conflict with another person's (or with previous project code). 2. There are different development environments. Just because the project works on my computer, doesn't mean it works on someone elses. 3. It takes time to verify that the tests work and then someone has to push the application to where it needs to be. These issues compound with each other, where it becomes harder and harder for huge applications with many people working on it. The way to solve this is Continuous Integration and Continuous Deployment. What Is Continuous Integration and Continuous Deployment?
Continuous Integration is a pretty simple concept. Let's say there's a code project that we're working on, and it's stored in a code repository (like GitLab) for versioning. Any time we add/change the project code on our computer, we make a commit for that change and push it to the GitLab repository. When that happens, we're not sure if the changes conflict with anyone else's code (or some other test we may not be able to run on our computer).
What "Continuous Integration" does is that commit will trigger a build and test to be done for our project. Each commit to the repository will cause a docker image for our code to build our application and run any tests we specify. We can then be notified if our code breaks anything or if everything is fine. This makes our personal life easier because we can commit our code and not have to do anything much to see if the project is still working, but on a larger scale, the other developers on our team can all commit their own code so we can have our project be constantly added too every single day. "Continuous Deployment" takes it a step further and allows us to specify that, if our build and tests were successful, we can automatically have the application be pushed to where it's meant to be deployed. (Staging, a live server, etc.) Continuous Integration and Deployment may be a bit tricky to set up, but it makes maintaining and working on projects much easier, so it's really worth it. All that needs to be done is to create a build/test environment (a docker image), as well as write the actual build/test instructions, and then specify what should be done if successful or not. So let's get into actually using Continous Integration with GitLab. Make A Starter Project On GitLab
We're going to be using GitLab as our code repository, and we'll be using their Continuous Integration/Deployment tools. Register for a GitLab account if you don't already have one.
Next, go to the GitLab page to create a new project. Name the project "srcmakeci" and press the Create Project button. 
If you've never created SSH keys for your GitLab account, go ahead and do so now. Just follow the instructions in this tutorial. (It's a little confusing, I know. The video I have for this topic shows me doing this, so watch it if you need help.)
Create A Code Project On Your Computer, And Push It To GitLab
Our repository on GitLab is created, but we want to push an example project to it to initially set it up. Let's create it. On your computer, clone a sample C++ project that I've set up on github.
git clone https://github.com/srcmake/sample-gitlabci-cpp-project
(Shout out to OlinData for actually setting this project up. Check the references at the end of this article to see the youtube video they did showing their GitLab demo.)
So our project is set up. It has one basic C++ file that prints hello world, one bash script file to act as the unit test for the C++ file, and a .gitlab-ci.yaml file to specify the continuous integration instructions. Our goal is just to set this up, so we're only going to take a brief look at it. The .gitlab-ci.yaml file has the following code inside of it:
# Specify the docker image to use (only used if using docker runners)
# See: http://doc.gitlab.com/ee/ci/docker/using_docker_images.html
image: ubuntu:14.04

# Define commands that run before each job's script
before_script:
  - apt-get update
  - apt-get install -y gcc g++

# Try to compile our sample hello world app
compile:
  script:
  # Compile our app
  - g++ helloworld.cpp -o helloworld
  # Verify that our compiled app works properly with a custom "test" script
  - ./verify.sh
  # Save the compiled output from the above for downloading via GitLab and in Gitlab 8.6 to use in future build steps
  artifacts:
    paths:
    - helloworld
We specify our docker image to be Ubuntu 14.04. Before we do any scripts, we need to set the image up by installing GCC to compile our C++ code. (It's the same as setting up a fresh Linux install.) We specify one command under "compile" which has a few scripts. One script to compile the C++ code, and another script to run the verify.sh file that acts as our unit test. Finally, the artifacts line will save the helloworld file so it can be used later (or downloaded from GitLab for us to view).
Using GitLab's Continuous Integration
Our code is set up, but what do we need to do to make this work on GitLab? Actually...all we need to do is push the project to GitLab. GitLab is really nice and they make it easy, they'll know that we want to use CI since we have the gitlab-ci.yml file, and they'll run our project's continuous integration commands on one of their shared "Runners". (Read the next section to learn more.)
Push the code to GitLab. (CHANGE the url to your gitlab project's url.)
git push https://gitlab.com/srcmake/srcmakeci
Then, on the GitLab project page, go to the "CI/CD" tab and check out the "Jobs" section. You'll see the CI commands running.
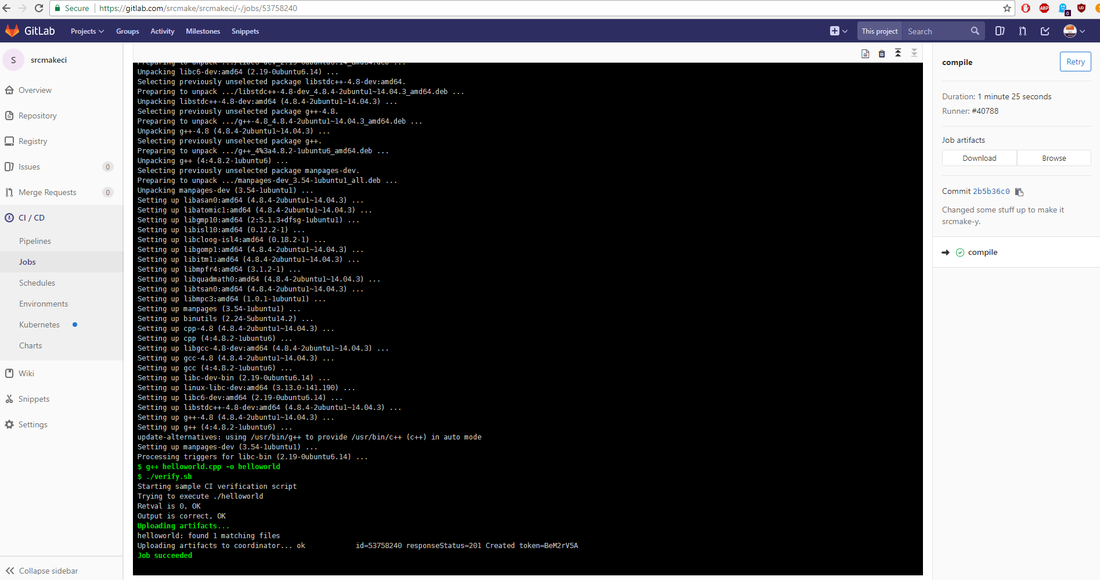
And that's it. Read the logs and download the artifacts if you want.
Conclusion - What To Do Next
Okay, so our GitLab CI introduction works, but it was pretty brief. But congrats, you now know how to use Continuous Integration! For free!
There are a number of improvements that we can make, though, for real projects:
That's a lot of stuff that we have left to do, before becoming CI/CD masters! I'll be going over all of those steps (eventually) in more blog posts and youtube videos, so make sure to follow me on the various platforms I have listed below.
Again, I'd like to shout out OlinData for making a useful demo of GitLab, as well. Feel free to check their youtube video out, as they do another GitLab demo with a bit more features than what we did in this article.
Here's the video where I go over this topic and do the demo.
Like this content and want more? Feel free to look around and find another blog post that interests you. You can also contact me through one of the various social media channels.
Twitter: @srcmake Discord: srcmake#3644 Youtube: srcmake Twitch: www.twitch.tv/srcmake Github: srcmake
References
1. The base project - github.com/srcmake/sample-gitlabci-cpp-project 2. OlinData's video - https://www.youtube.com/watch?v=M5obJTtD5BU
To watch the youtube video on this topic (recommended if you've never used the service before), click here.
Introduction: IBM Watson's Visual Recognition Service
We've already done a tutorial on Watson's Tone Analyzer to get us started with using Watson, so to continue learning about Watson, we're going to use his Visual Recognition service in this article.
The Visual Recognition service is actually exactly what the words mean: the service will accept an image and output some classification results of what it thinks the image is, with a certain confidence rating. Additionally, you can train your own classifier to recognize your own images.
Setting Up The Service On IBM's Website
We're going to set up the Visual Recognition service on IBM's website. Sign up for a Bluemix account if you haven't already. (You don't need a credit card, it's an easy signup.)
Next, go to the Visual Recognition page and click the "Get Started Free" button. It should automatically create the project for you. You should see something like this: 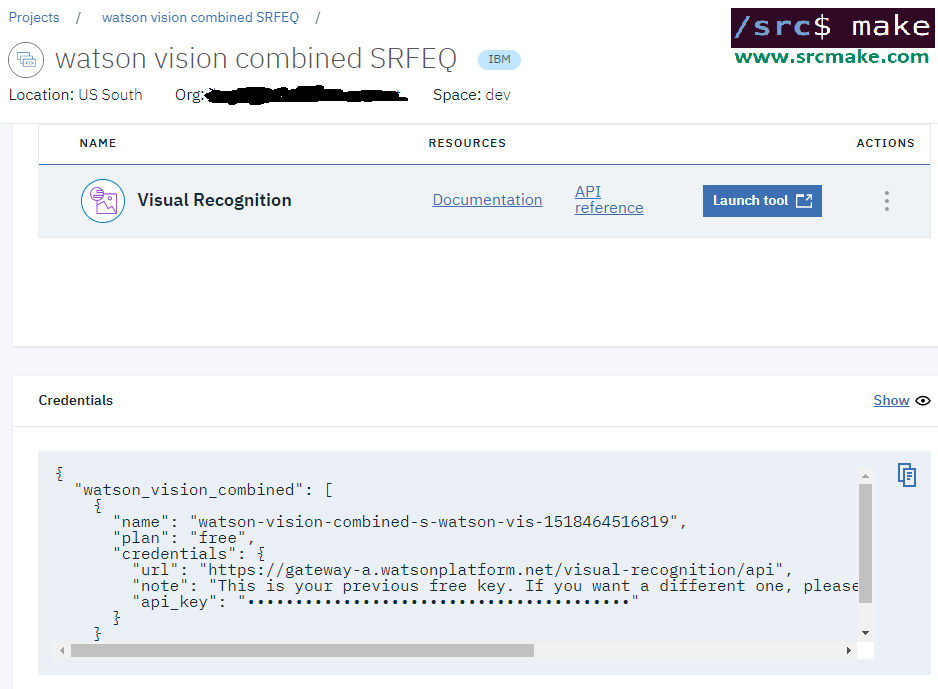
Click the "Show" button and copy the API key. Hit the Launch tool button. Now then...
Playing With The Visual Recognition Tool
You should see the following page if you launched the Visual Recognition Tool. (If you don't see the page, then click here.)
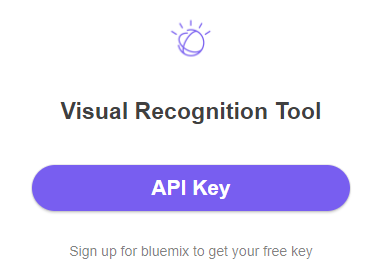
Click the API key button and enter your API key.
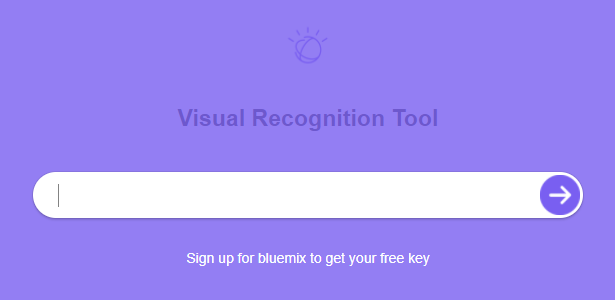
You should see the following if your API key works.
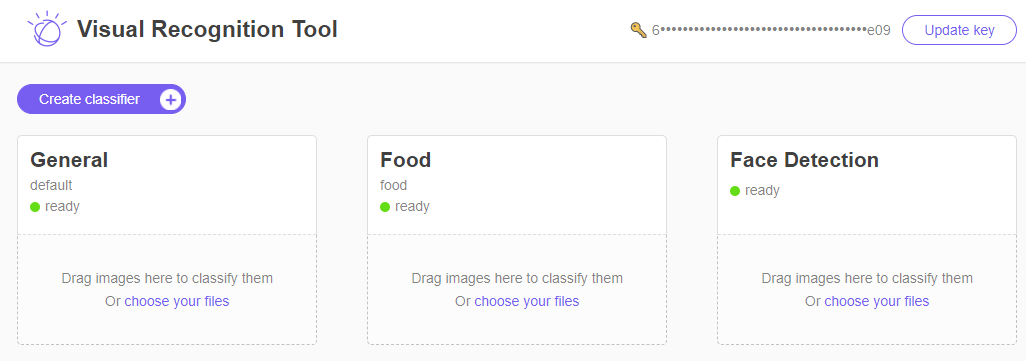
Congrats, your Visual Recognition service is set up on Watson. Sort of. Play with the webpage, by downloading pictures and loading them into the widgets so that you can see how the classification works. Here are three sample pictures, right click -> Save image.
If you drag the pictures into the Visual Recognition service, you'll see something like the following.
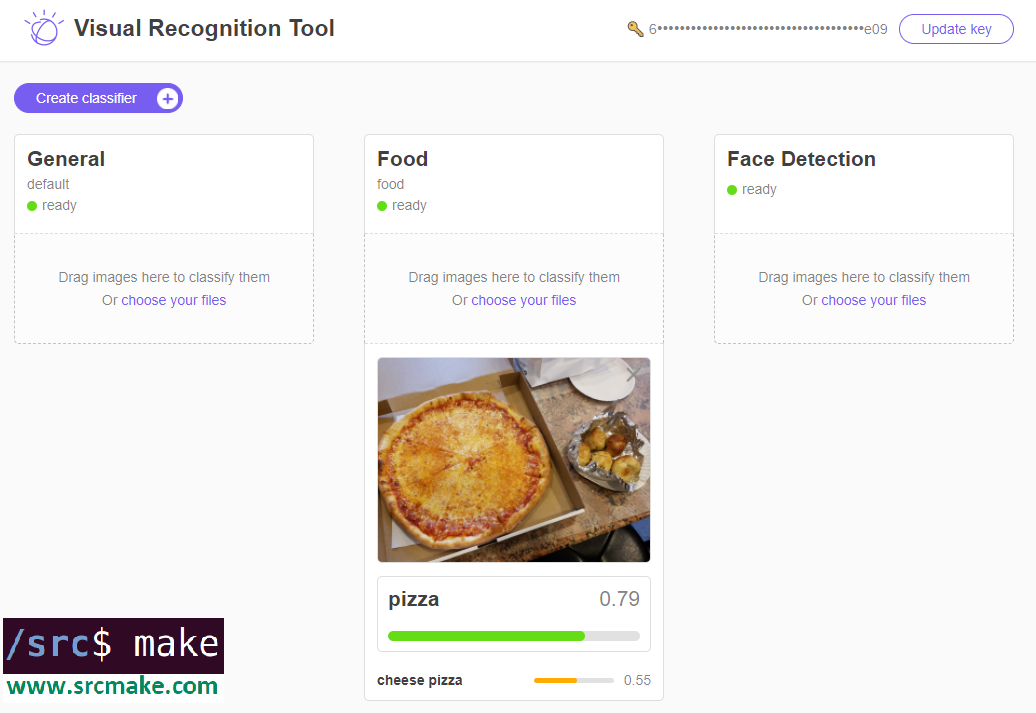
As you can see, there are currently three Visual Recognition tools, a General classifier, a Food classifier, and a Face classifier. Feel free to play with the tool a bit more, but...we need to actually write some code now.
Creating A Node Project To Use The Visual Recognition Service
The webpage to use the tool is fun and all, but we need to be able to use this service in our actual code projects. Let's create a basic node project to use the Visual Recognition service.
Since we already created a starter node project for the Tone Analyzer tutorial, we'll just copy the code from github for this project. In your terminal, copy the project (and move into the directory) with the following commands:
git clone https://github.com/srcmake/watson-node-starter
cd watson-node-starter
It's just a basic node project with the watson library installed, and a config.js file to store our credentials.
Open the "config.js" file and enter the API key that we got when we created the service on IBM's website.
We need a test image to try and recognize, so download the following image, move it into our project folder, and rename it to "pizza_2.jpg".

Save this picture, rename it "pizza.jpg", and move it to the project folder.
Okay, our base Watson node project is set up. Now we need to actually write some test code to run this service. We COULD make API calls to the Visual Recognition endpoint using basic HTTP API requests, but we're going to use Watson's library. You can see the API reference for making the API calls.
In our "index.js", add the following code:
Run the project with the following command.
node index.js
The output should be the following:
Pretty interesting, there are a lot of results. Of course, we used the "General" Visual Recognition tool, not the one for Faces or Food. To try those out (and see how the Visual Recognition API works), check out the API reference documentation.
From this point, we know that we can make API calls using the Watson Visual Recognition service to classify our images. We can extend this code for any program we may need. It's machine learning without actually doing any of the training! However...
Training a Custom Classifier
We can use Watson's General, Food, or Face visual recognition services to classify any images that we'd like too, but we can also train our very own classifier using the Visual Recognition tool.
It works like any other machine learning classifier: you feed Watson training data (images) with the correct labels, and Watson learns to classify new images with the labels.
Theoretically, we can use the Visualizer tool to train the classifier.
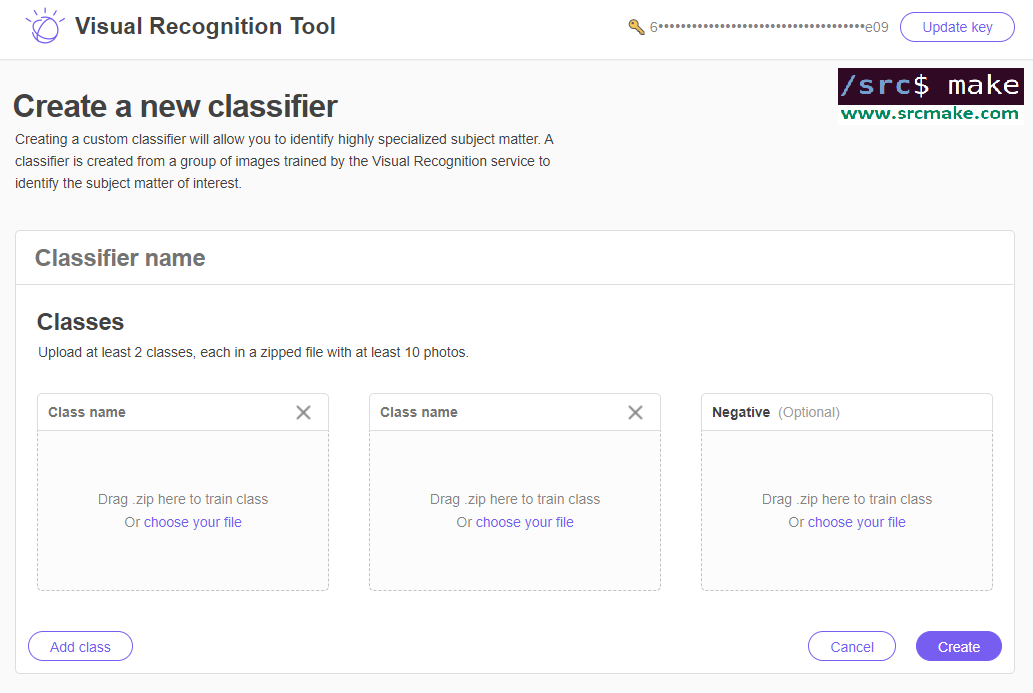
But let's look at the coding way.
The documentation for this on IBM's website provides a nice example for why we would need this. Perhaps we need to classify between specific dog breeds: in that case, we could feed Watson example pictures of huskies, beagles, and golden retrievers (as well as pictures that are not dogs) so that he could learn to classify dog breeds.
We're going to edit our node project to train a dog classifier. First, we need our training data. We're going to use the dog images provided in IBM's website. Download beagle.zip, husky.zip, golden-retriever.zip, and cats.zip by clicking each of those links. If that doesn't work, then click the links to download them from IBM's documentation page. Add all of the zip files to our project folder.
Next, edit our index.js file to classify the dog breeds. Here's the code to change "index.js" to:
The only thing that changed are the parameters, which names our classifier and the training data files. We also use the "createClassifier" method of visual recognition to create the classifier.
Time to create our classifier. In the terminal:
node index.js
The output will be as follows:
It's a bit boring, but make note of the classifier id. We'll need to call this particular classifier when we want to actually use it.
Using Our Custom Classifier
We made a custom classifer, but how do we use it? Well...we can go back to the webpage for the Visual Recognition demo, enter our API key, and we'd see that our classifier now shows up.
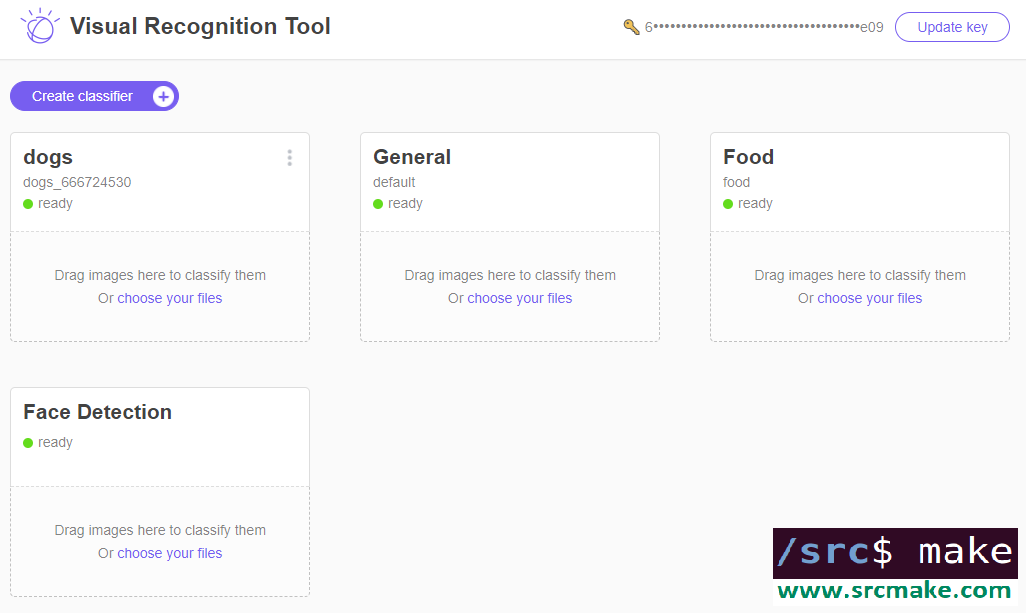
You can test it out there, although most likely you'll want to access the classifier using a program.
Luckily, the Watson library is going to help us with this. Actually, it's literally the same code that we used before to classify an image. Just uncomment line 18 and add your own classifier id. (And change the test picture name.) I won't be typing this out since we just covered it, but in the video I will go over this, so watch the video if you want to see me use the custom classifier in our Node project. Conclusion
We did a lot, but now you can use Watson's Visual Recognition service to classify images. You're also able to use it to train your own data and make your own classifier. Of course, we went over a lot of Node example code, but you can take that code and spin it off for your own personal project. You can also write this code in Java or Python, just look at the references to see IBM's example code. (Although obviously, the code we wrote is wayyyy better.)
The video for this topic, where I go over all the steps, is found below.
Like this content and want more? Feel free to look around and find another blog post that interests you. You can also contact me through one of the various social media channels.
Twitter: @srcmake Discord: srcmake#3644 Youtube: srcmake Twitch: www.twitch.tv/srcmake Github: srcmake
References:
1. www.ibm.com/watson/services/visual-recognition/ 2. console.bluemix.net/docs/services/visual-recognition/getting-started.html#getting-started-tutorial 3. www.ibm.com/watson/developercloud/visual-recognition/api/v3/ 4. console.bluemix.net/docs/services/visual-recognition/tutorial-custom-classifier.html#creating-a-custom-classifier
To watch the youtube video where I demo the code, click here.
Introduction: NoSQL
In another tutorial, we looked at using MySQL/SQL as our data storage persistence tool. Relational databases like MySQL hold data in tables, in a very structured format. However, NoSQL is a type of database where data isn't stored in a structured format: the data is stored in a very free unstructured way. Basically as JSON.
Why Use NoSQL?
So why would you use NoSQL as your database choice? Actually, NoSQL ends up being faster sometimes. Additionally, it takes less tables and commands to use the data stored in NoSQL databases. I like the example that tutorialspoint gives, so take a look at that webpage to see why NoSQL is better.
Mongo Is Pretty Popular
Mongo is a very popular NoSQL database. Where SQL databases have "tables", Mongo has "collections" of related data. Each entry in this collection is basically JSON with the relevant data in it.
In the next sections, we're going to look at how to install Mongo, and how to use it locally. Installing Mongo
To install Mongo on Ubuntu, use the following commands in your terminal. (Thanks to the article on Digital Ocean, for going in-depth about this installation.)
sudo apt-key adv --keyserver hkp://keyserver.ubuntu.com:80 --recv EA312927
echo "deb http://repo.mongodb.org/apt/ubuntu xenial/mongodb-org/3.2 multiverse" | sudo tee /etc/apt/sources.list.d/mongodb-org-3.2.list
sudo apt-get update
sudo apt-get install -y mongodb-org
sudo systemctl start mongod
The above commands install and start mongo. However, the service will stop any time you shut your computer (Ubuntu) off.
To start the service so that you can use mongo (any time you restart the computer), run the following command in your terminal.
sudo systemctl start mongod
Using Mongo - The Commands
So we have Mongo installed, but now we need to use it. To run mongo, use the following command in your Ubuntu terminal. (And be sure the service is started.)
mongo
This will turn your linux command line into a mongo command line. You'll notice because the beginning of each line will change from something like "srcmake@ubuntu: ~/Documents/mongo $" to a plain and simple ">".
So now we're using mongo, what should we do? Let's go over some commands. (Thanks to a tutorial on scotch.io for going over these commands.)
First, check what individual databases we have.
show dbs
You may see one named "local", but let's create our own database. First, we use a DB named "srcmakeDB" (this command will create the DB if it doesn't exist), and then the "db" command will tell us which DB we're currently using.
use srcmakeDB
db
So now our database is set up, but we need to create and edit some data. In SQL, we'd create a table, but for mongo, it's a little different...Remember that mongo stores unstructured data in (basically) JSON format.
In one command, we're going to create a "blogposts" collection (since it doesn't already exist), and add two blogposts to the collection.
db.blogposts.save([{title: 'how to hack', author: 'srcmake'}, {title: 'coding 101', likes: 102}]);
As you can see, one blogpost has a title and an author field, and the other has a title and a likes field. We save these to the blogposts collection (if it doesn't exist, then mongo will create it), and that happens in the DB that we're currently working in. (Which is srcmakeDB from the previous use command.)
Add one more blogpost to see how to add only one. (No [ ] brackets this time.)
db.blogposts.save({title: 'best coder ever', who: 'srcmake'});
So now we have three entries in our "blogposts" collection. How do we view them?
db.blogposts.find();
The above command will list all items in "blogposts". What if we want to specify some criteria to search better?
db.blogposts.find({author: 'srcmake'});
The above command specifies to find results where the author is 'srcmake'.
Updating an entry works in a similar manner. db.blogposts.update({author: 'srcmake'}, {author: 'make src'}); db.blogposts.find();
The first command, above, will search for an entry in blogposts where the author is "srcmake", and will change that entry to {author: "make src"}. (NOTE: It only affects the first match, not duplicates, and since we don't specify it, it will delete the {title: "how to hack"} part that we had before.
Speaking of deletion, to delete an entry... db.blogposts.remove({ author: 'make src' }); db.blogposts.find();
As you can see, the above command will search for an entry where the author is "make src", and then it will remove that entry.
To remove all blogposts:
db.blogposts.remove({});
And that's how you use mongodb in the command line. Conclusion
We've taken a look at what mongoDB is and how to use it on our own computer. It's super useful to know how to do this so that whenever you need to model a database or play with some data, you can locally test things out.
Obviously, you're most likely to use mongo in your Node (or other programming language) code, so keep an eye out for the tutorial I'll make for that topic.
The following video shows me demoing the code and explaining why it works.
Like this content and want more? Feel free to look around and find another blog post that interests you. You can also contact me through one of the various social media channels.
Twitter: @srcmake Discord: srcmake#3644 Youtube: srcmake Twitch: www.twitch.tv/srcmake Github: srcmake |
AuthorHi, I'm srcmake. I play video games and develop software. Pro-tip: Click the "DIRECTORY" button in the menu to find a list of blog posts.

License: All code and instructions are provided under the MIT License.
|