|
To watch the video going over this topic, click here.
CircleCI - Introduction
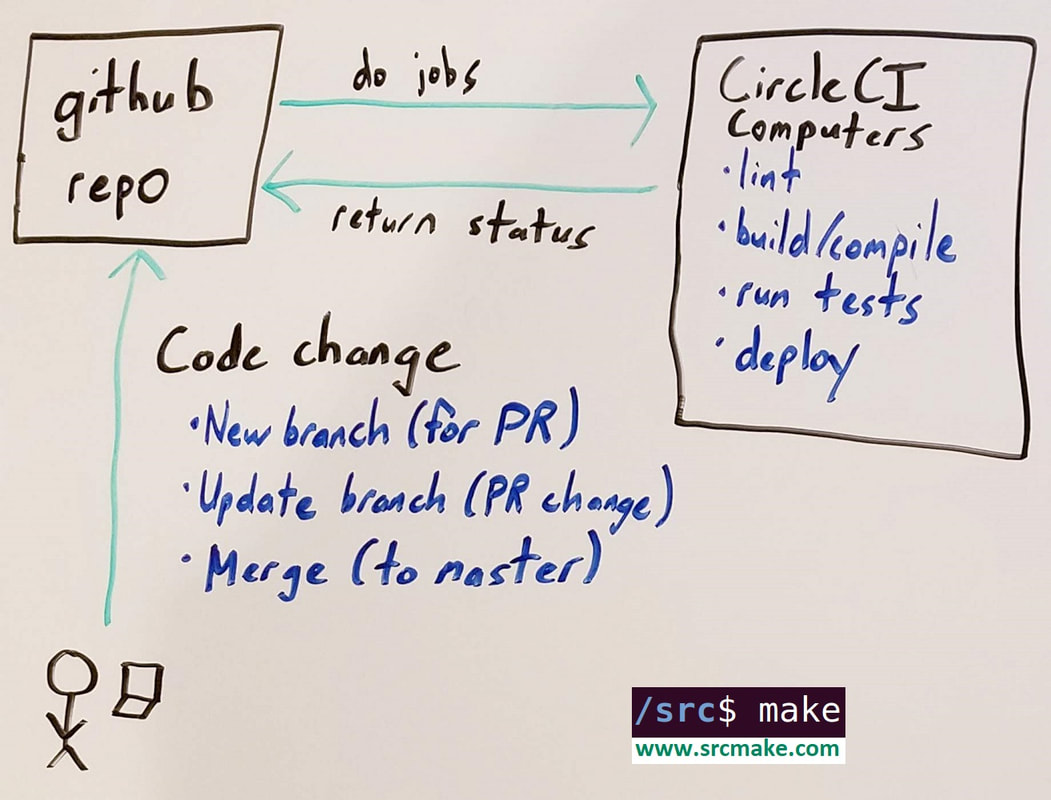
CircleCI is a service that detects when your codebase changes and runs jobs (that you define) on the code. It's used for CI/CD.
The reasons to use CircleCI are:
In this blogpost we're going to create a simple project -> create a repo for that project on github -> setup CI with CircleCI. Our Sample Python Project
Let's create a file named "main.py" and add the following code to it:
We can run this file with the following command (in your terminal):
python3 main.py
Let's also create a file named "main-test.py" to test our main file.
We can run the test using the following command (in your terminal):
python3 main-test.py
Push The Project To Github
Let's create a github repository for this project. Go to github and make a new repo named "circleci-demo".
Now let's push our project (which is currently on our local computer) to the github repo. (Make sure to change the username to be yours. Mine is srcmake.) In your terminal: git init git add . git commit -m "Initial commit" git remote add origin https://github.com/srcmake/circleci-demo.git git push -u origin master Setting Up CI With CircleCI
So our github repo is set up, now we want to enable CI on it by setting up CircleCI.
We need to create a configuration file so that CircleCI will know what we want it to do . Create a folder named ".circleci" and inside of it create a file named "config.yml". mkdir .circleci touch .circleci/config.yml Open ".circleci/config.yml" and add the following code:
Notice that we have two types of tasks (jobs) that we want CircleCI to do: We want to run main.py, and we want to run our tests. We're also specifying that for every branch we want to perform the build job, and the test job.
The official CircleCI Docs can show how to create more complex configurations, but this is a good starting point. We also need to give CircleCI access to our repo so that they're authorized to run these jobs. Go to CircleCI's website, login in with your github account, and authorize them to access your circleci-demo repo that we just created. Now let's push our new config file to github. git add . git commit -m "Adds CircleCI config file" git push CircleCI should detect the code changes and run our build_and_test workflow for our branch. We should be able to see the jobs run on CircleCI's website. (Pro-tip: If there are errors then make sure your config.yml is linted correctly. Use 2 spaces instead of tabs.) The full source code for this project can be found here. Testing That CircleCI Is Working
We have CI running now so let's test it out. Let's add a line to our unit test for our Add function to make sure 5 + 5 is equal to 10.
Check out a new branch:
git checkout -b add-test
Add the following line of code to our TestAdd() function in "main-test.py":
assert Add(5,5) == 10
Push this branch up to github. git add . git commit -m "Adds test to make sure 5 + 5 is equal to 10" git push --set-upstream origin add-test Let's go to our github repo and make a Pull Request for this branch to see if CircleCI is running our jobs. We should see a build job and a test job with green checkmarks since they pass. We have CI working properly. Of course, the useful part of CI (and unit tests) is making sure our codebase is working properly. Let's see what happens if we mess up old code by making our Add function do multiplication instead of tradition. In "main.py" change our Add function to multiply instead of add.
return a * b
Commit this change and push our updated branch to github. git add . git commit -m "Add function now multiplies instead of adds" git push If we look at our Pull Request, we should see that the build step passes since the code is still functional, but now our test fails since 2 * 3 isn't 5. So now we'd know the code change being introduced by this branch is harmful and we shouldn't merge this PR (and CircleCI can use that info to stop other jobs, like making sure not to deploy if the tests fail). Conclusion
CI/CD is very important, and we've seen how to use CircleCI to set up CI. Our project was very simple, but extending the project to more complicated scenarios isn't that hard once you have the base config file. And of course, setting up the CD part is as simple as adding a job to deploy and adding that to our workflow.
A few examples of how to make the most with CI/CD and CircleCI are:
Keep an eye out for a more advanced CircleCI tutorial where we go through setting up the config for a Dockerized project that will also CD to a cloud host like Heroku.
Like this content and want more? Feel free to look around and find another blog post that interests you. You can also contact me through one of the various social media channels.
Twitter: @srcmake Discord: srcmake#3644 Youtube: srcmake Twitch: www.twitch.tv/srcmake Github: srcmake Comments are closed.
|
AuthorHi, I'm srcmake. I play video games and develop software. Pro-tip: Click the "DIRECTORY" button in the menu to find a list of blog posts.

License: All code and instructions are provided under the MIT License.
|


