|
To watch the video where I go through this tutorial with you (recommended), click here.
Introduction - Ethereum Smart Contracts
In this tutorial, we'll look at the basics of creating ethereum smart contracts. We'll begin by installing the Ethereum Wallet (to interact with the Ethereum blockchain), then we'll look at a basic smart contract by having a small Hello World example. We'll finish with some references to the Solidity programming language.
Installing Ethereum Mist (Wallet)
So what is Ethereum Mist and how do we install it? Ethereum Mist is basically a tool we use to manage our ethereum wallets, our ether (money), and what we use to deploy our smart contracts and view transactions. It's basically a middleman for interacting with the Ethereum blockchain.
To install the Ethereum Wallet, click the Download button on Ethereum's homepage. Download the Ethereum Wallet installer appropriate for your machine. (I'll personally use the linux64.zip one for my Ubuntu 16.04 Virtual Machine.) Unzip the files, and inside there will be an executable file named "ethereumwallet". Run it, and you should see this: 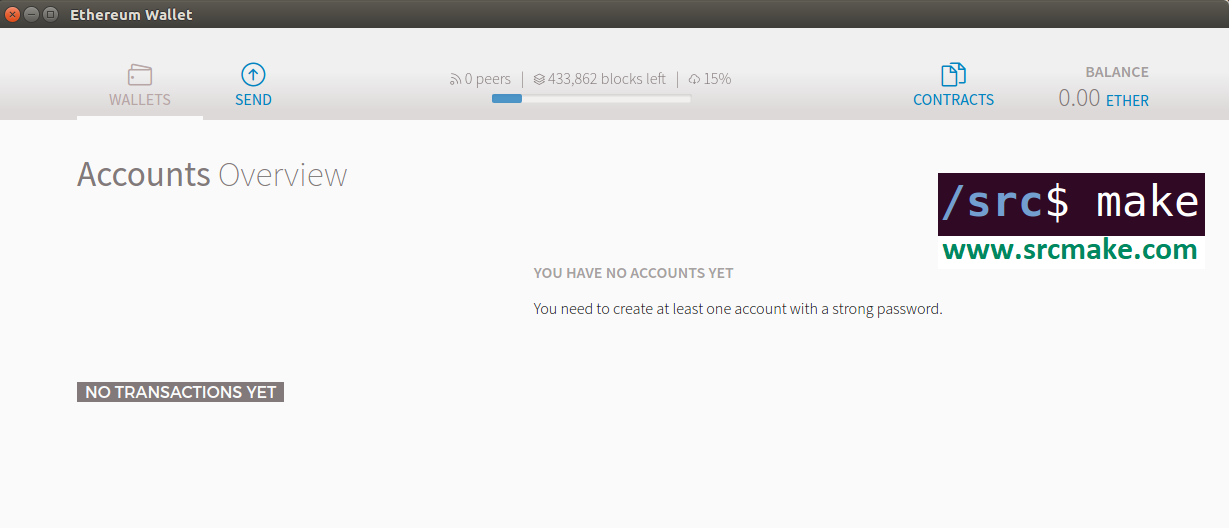
Ethereum Mist's home screen.
Let's get started by testing it out.
Setting Up Our Ethereum Wallet (Switching Networks)
So we have our Ethereum Wallet installed, but how do we use it to develop smart contracts and send ether and mine and stuff?
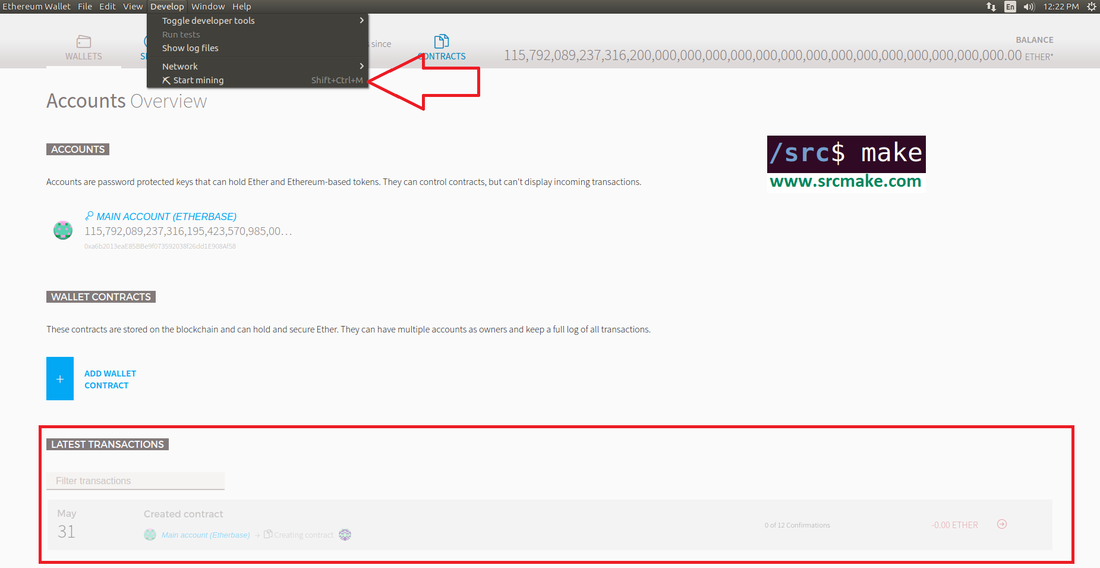
The first thing we need to do is switch network's to a test network. (We're going to play around and develop here.) In the top-bar menu, click Develop -> Network -> Solo network.
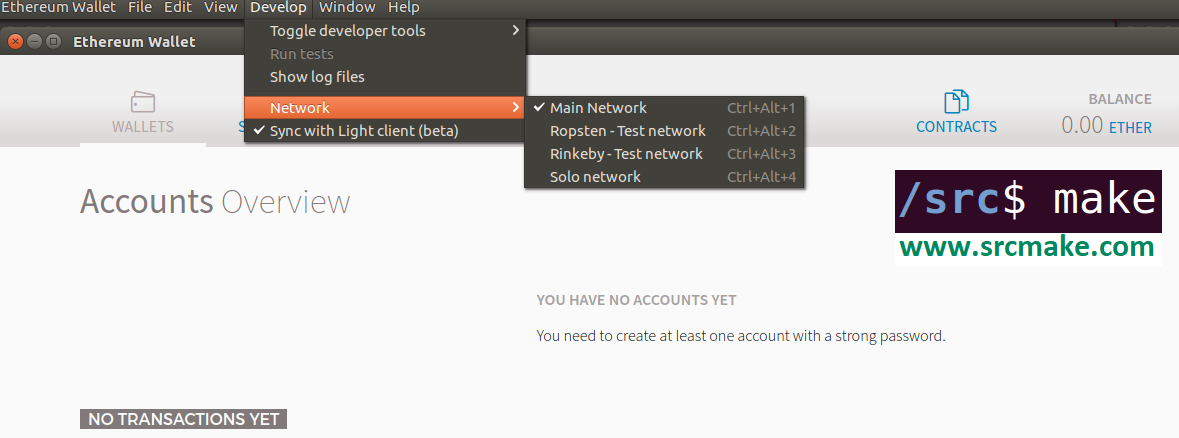
Ethereum Wallet switching networks.
Give Ethereum Wallet a second to switch over to the test network.
This will set us up on a solo network with an account that has infinite Ether. Great for testing. 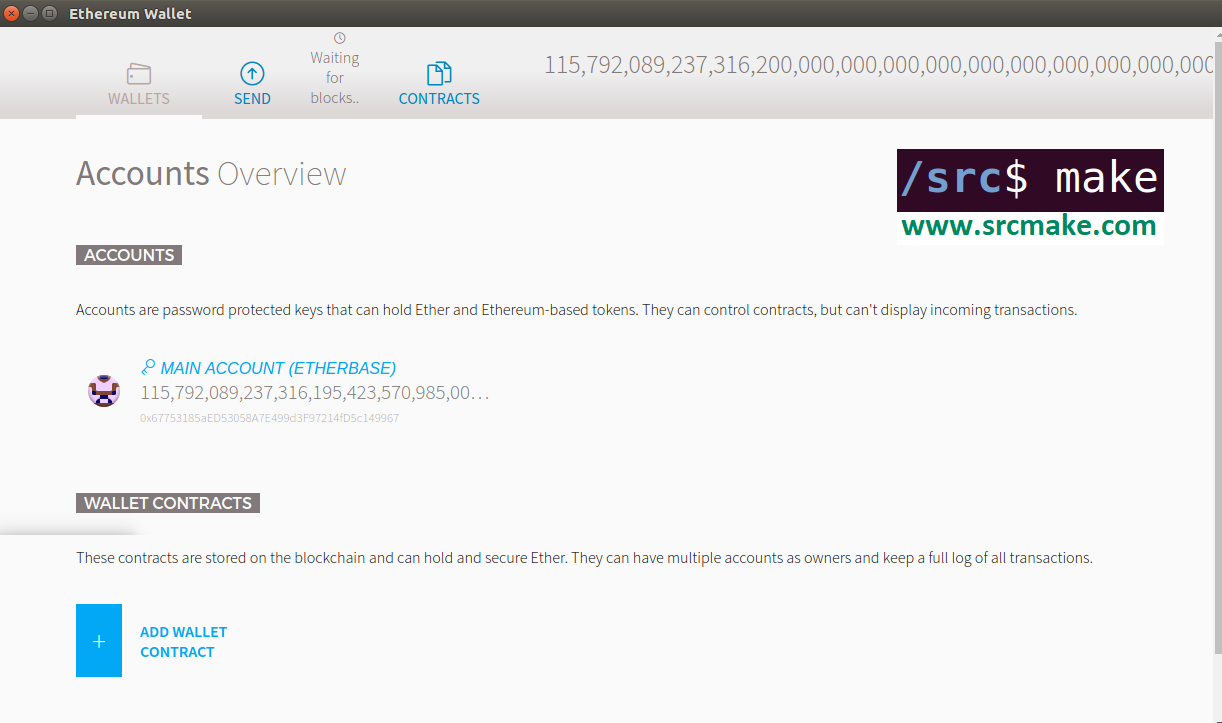
Ethereum Wallet Solo Network.
If you want to use a real test network, then you can change the network to Rinkeby.
Setting Up Our Ethereum Wallet (Creating A Wallet)
If you do use a real testing network then you need to create an account/wallet. In the menu, go to File -> New account, and enter a password and press OK.
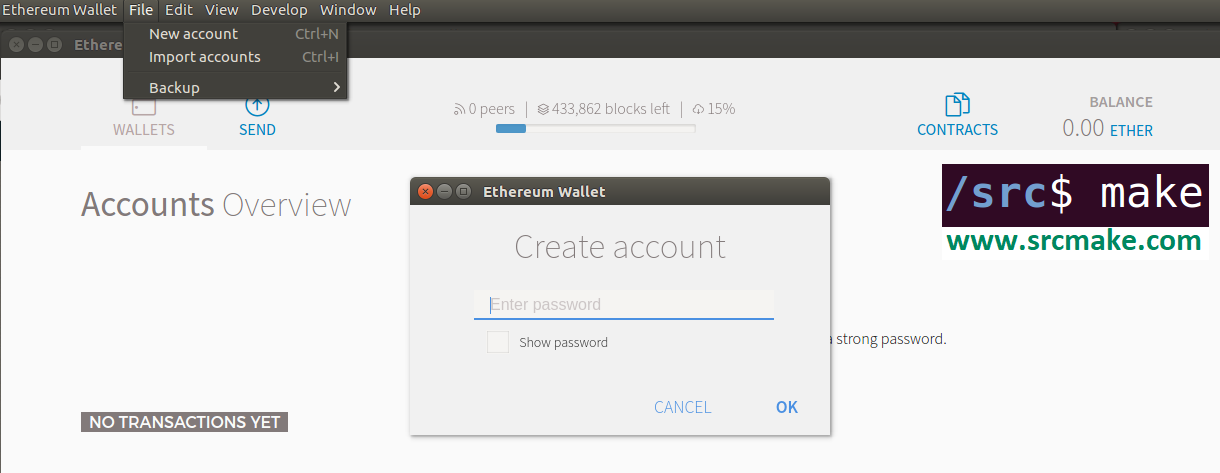
Ethereum Wallet creating account.
You should see a new account created. In a bit, you'll also see some blocks being downloaded onto your computer. That's the Rinkeby Network's ledger (literally the blockchain - chain of "blocks") being downloaded onto your computer.
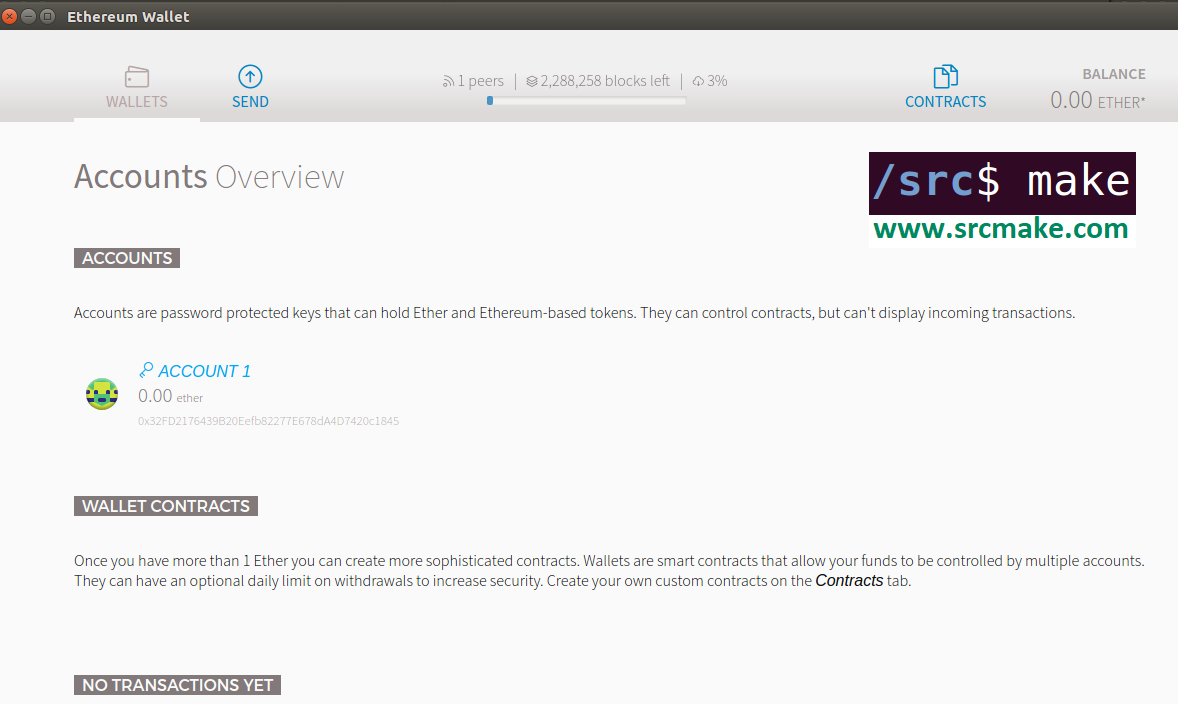
Account created, but waiting for blocks to download.
Now the bad thing about using the test networks is that (I think) you need to wait for all of the blocks to download before being about to Mine (you can mine by Menu Bar -> Develop -> Start Mining), which takes a lot of time...and you need Ether to pay for gas money to deploy contracts...
So a solo network is better to start with. You can set up a test network overnight or something. You can play around with the buttons for now, but let's look at how to deploy a smart contract. Creating An Ethereum Smart Contract
Smart Contracts are literally just tiny programs (sets of rules) that get pushed onto the Ethereum Blockchain and get executed. Smart contracts are written using the Solidity Programming language.
Here's a very basic smart contract example written in solidity, which handles the creation and transferring of a custom token named "srcmakeToken".
You can read the comments in the code. The contract is basically:
Deploying Our Smart Contract To The Blockchain Using Mist
So how do we deploy this contract to the Ethereum Blockchain? We'll do it by using Ethereum Mist. Go to the Contracts tab and click Deploy Contract. Enter the solidity code from above. Press "Select Contract" on the right and choose srcmakeToken from the drop down menu.
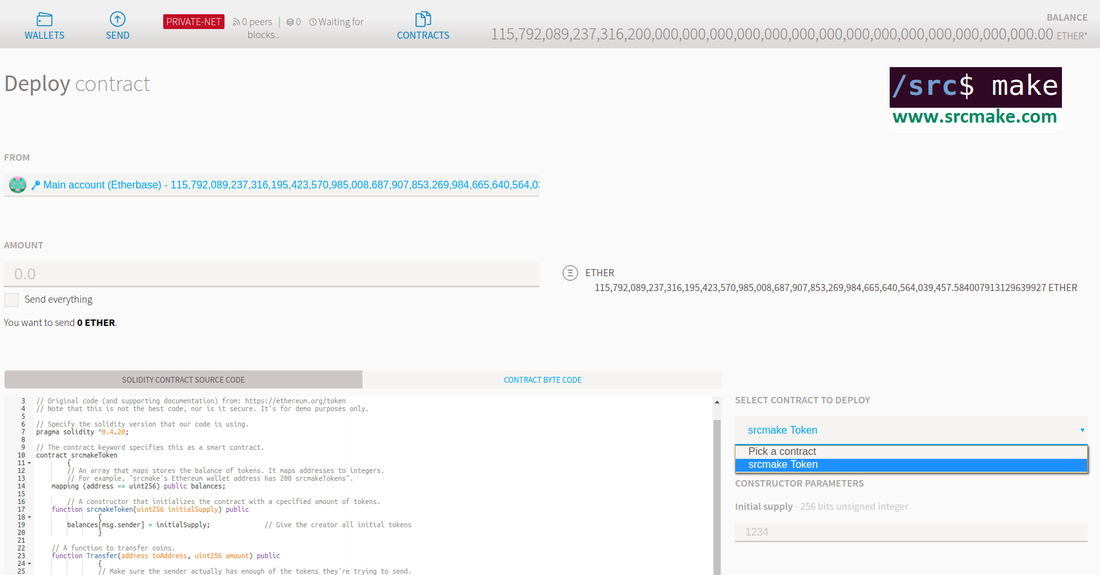
Deploying our smart contract using the Contracts tab.
Notice the Initial supply. Enter 200, meaning we'll start with 200 srcmakeTokens when our contract is deployed.
Scroll down and press Deploy. (The fee is 0 Ether if we're on the test network.) Hit the "Send Transaction "button on the pop-up window. 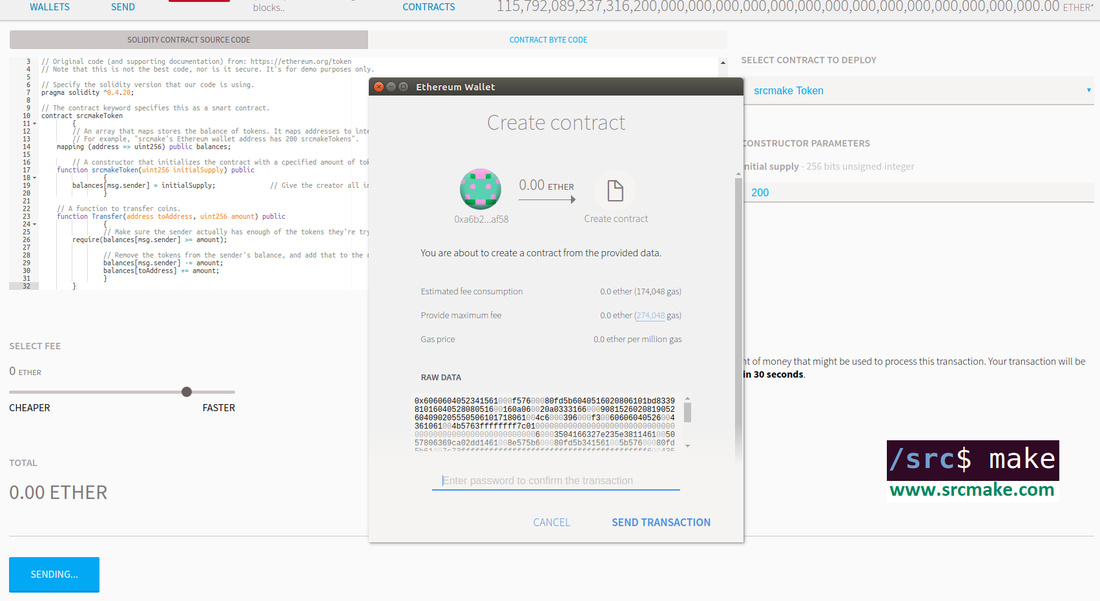
Send the transaction to the blockchain.
And it's that simple to send a transaction/smart contract to the Ethereum blockchain.
Our Contract is Deployed. How Do We Use It?
You should see, on the wallet tab, that our contract is deployed.
Smart contract deployed. Waiting for confirmations.
Now I'm gonna be super honest with you: it's a bit vague on how to get this to work, because it can easily get stuck at 0/12 confirmations. The tricks I use are to:
If it works then under the contracts tab you should see the contract deployed. You can select the contract and perform any of the functions the contract allows. (In our case, we only have a transfer function.)
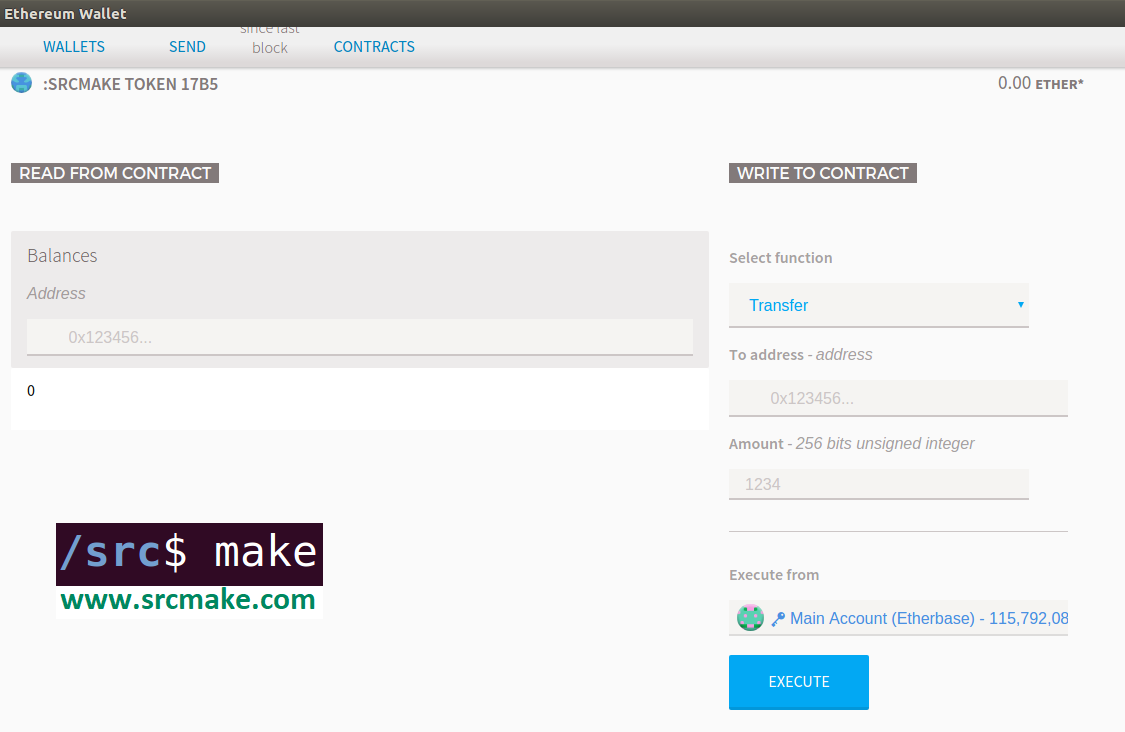
Using the smart contract's functions.
And that's it. If you make more detailed contracts, then you can do more stuff. If you want to transfer tokens to someone, you see right in the picture that the UI makes it possible.
Solidity Tutorial
As we've seen, smart contracts are made using the Solidity programming language. Of course, to write smart contracts requires knowing the language syntax and keywords.
This page from learnxinyminutes for Solidity will help teach you a bit about how Solidity is used. Use it as a good introduction, but make sure to pay attention to the official Solidity documentation here. Conclusion
So this was an introduction to using Ethereum Mist's Wallets to manage our wallet and deploy Ethereum smart contracts. Of course, this was like a Hello World exercise. We can go much deeper with more sophisticated smart contracts and using Ethereum Mist Wallet to do other things, such as making full dApps.
Keep an eye out on my social media/youtube channels to see more advanced tutorials. (It's especially important to learn how to use security tools to keep your code and the user's involved safe.)
Like this content and want more? Feel free to look around and find another blog post that interests you. You can also contact me through one of the various social media channels.
Twitter: @srcmake Discord: srcmake#3644 Youtube: srcmake Twitch: www.twitch.tv/srcmake Github: srcmake
References:
1. Ethereum's home page. 2. Official Ethereum Token tutorial. 3. Learnxinyminutes Solidity tutorial. Comments are closed.
|
AuthorHi, I'm srcmake. I play video games and develop software. Pro-tip: Click the "DIRECTORY" button in the menu to find a list of blog posts.

License: All code and instructions are provided under the MIT License.
|